iCSee Pro for PC - Free Download on Windows 7/8/10/11 & Mac
In an era where security is a top priority for both homes and businesses, many individuals are turning to smart surveillance solutions to keep their properties safe. One such solution is the iCSee Pro app, which allows users to monitor their security cameras via their mobile phones. But what if you want to access your surveillance feeds on a larger screen, like your PC or Mac? Fortunately, it's possible to download and use the iCSee Pro app on on your PC device.
In this detailed guide, we'll walk you through the steps required to install and use the iCSee Pro app on both Windows and Mac computers. Whether you’re using a Windows laptop, desktop, or a Mac, we’ve got you covered with easy-to-follow instructions. Let’s dive in!
What is iCSee Pro?
Before we dive into the installation process, let’s quickly recap what the iCSee Pro app is and why it’s so popular for security camera monitoring.
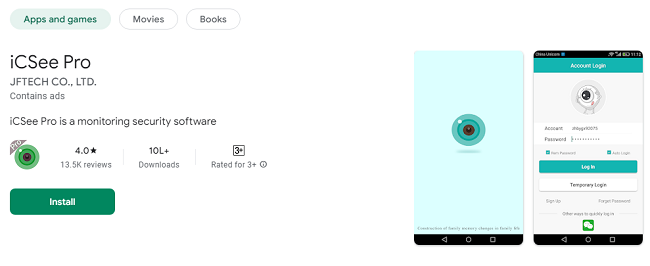
The iCSee Pro app is a mobile application designed to allow users to connect to and monitor IP security cameras remotely. It supports a range of features such as live video streaming, motion detection alerts, two-way audio, playback of recorded footage, and more. The app is highly regarded for its ease of use and compatibility with a variety of IP cameras, making it a top choice for both personal and business security.
Typically, users install the app on their smartphones for convenience. However, with the increasing trend of managing security on larger screens, many users are interested in running iCSee Pro on their PC or Mac devices. Luckily, with a few simple steps, you can access all the app’s features on your computer.
Why Use iCSee Pro on Windows or Mac?
While the iCSee Pro app is optimized for mobile use, there are several reasons why you might prefer using it on a larger device:
Larger Screen: Monitoring your security cameras on a bigger display offers better visibility and allows for easier interaction with the interface.
Improved Performance: Running the app on a PC or Mac may provide a smoother and more stable experience, especially when handling multiple camera feeds simultaneously.
Convenience: If you already spend a lot of time at your PC or Mac, using the app on these devices eliminates the need to constantly switch between your phone and computer.
Now, let’s explore how you can download and set up iCSee Pro on your Windows or Mac device.
How to Download iCSee Pro for PC Windows?
Step 1: Install an Android Emulator on Windows
The iCSee Pro app is designed for Android and iOS devices, but since it’s not natively available for Windows PCs, you’ll need to use an Android emulator to run the app on your computer. An emulator mimics the Android environment on your PC, allowing you to download and run Android apps.
Here’s how to install an Android emulator and get the iCSee Pro app running on your Windows PC:
1. Download an Emulator:
There are several Android emulators available for Windows. The most popular ones include:
BlueStacks: One of the most reliable and well-known Android emulators. It’s user-friendly and supports a wide range of apps, including iCSee Pro.
NoxPlayer: Another popular choice, NoxPlayer is known for its fast performance and compatibility with various apps.
LDPlayer: LDPlayer is another efficient emulator, especially for running Android apps smoothly on Windows PCs.
For this guide, we’ll use BlueStacks as an example.
2. Install BlueStacks:
Visit the BlueStacks website and click on the “Download BlueStacks” button.
Once the download is complete, open the installer and follow the on-screen instructions to install BlueStacks on your Windows PC.
After installation, launch the BlueStacks app.
Step 2: Set Up BlueStacks
When you open BlueStacks for the first time, you’ll need to sign in with your Google account. This will allow you to access the Google Play Store and download Android apps.
If you don’t have a Google account, you can create one directly within the BlueStacks interface.
Step 3: Download iCSee Pro from the Google Play Store
After signing in to your Google account, open the Google Play Store within BlueStacks.
In the search bar, type “iCSee Pro” and press Enter.
Click on the Install button next to the iCSee Pro app.
Once the app is installed, you can find it in your BlueStacks home screen.
Step 4: Launch and Use iCSee Pro on Windows
Click on the iCSee Pro icon to launch the app.
The app will open in a window just like it would on an Android device.
You can now set up your camera feeds, configure alerts, and start monitoring your property right from your Windows PC.
Step 5: Configure iCSee Pro Settings
Once the app is installed and running on your Windows PC, you can set it up to monitor your security cameras. Just follow the on-screen prompts to add cameras, adjust the settings, and configure motion alerts or video storage.
How to Install iCSee Pro on Your Mac?
Getting iCSee Pro on a Mac device follows a similar process to installing it on Windows, using an Android emulator. Here's a step-by-step guide:
Step 1: Download an Android Emulator for Mac
The first step is to download an emulator that allows you to run Android apps on your Mac. Popular emulators for macOS include:
BlueStacks for Mac: The same emulator we recommended for Windows. It’s also available for macOS and offers a seamless experience.
NoxPlayer for Mac: A strong alternative, NoxPlayer provides a reliable Android emulation experience on Mac computers.
Genymotion: This is a more advanced emulator, often used by developers, but it works well for running apps like iCSee Pro.
For this guide, we’ll use BlueStacks for Mac.
1. Download BlueStacks for Mac:
Visit the BlueStacks website and download the Mac version of the emulator.
After the download is complete, open the .dmg file to install BlueStacks on your Mac.
Follow the installation instructions, and once the process is finished, open BlueStacks.
Step 2: Set Up BlueStacks on Mac
Launch BlueStacks, and when prompted, sign in with your Google account.
If you don’t have a Google account, you can create one during the setup process.
Step 3: Install iCSee Pro from Google Play Store
In BlueStacks, open the Google Play Store.
Use the search bar to find the iCSee Pro app.
Click Install next to the iCSee Pro app.
Wait for the app to download and install on BlueStacks.
Step 4: Launch iCSee Pro on Mac
After the installation is complete, click on the iCSee Pro icon in BlueStacks to open the app.
You’ll now be able to monitor your security cameras and manage the app just like you would on an Android device, but on your Mac screen.
Step 5: Configure Settings on iCSee Pro for Mac
Similar to the Windows process, you can add cameras, configure alerts, and customize the settings for your security system once iCSee Pro is running on your Mac.
Troubleshooting Tips
While installing and using iCSee Pro on your PC or Mac, you may encounter a few common issues. Here are some troubleshooting tips to help:
1. The App Won’t Install
Solution: Ensure that your emulator is properly installed and up-to-date. If necessary, try reinstalling the emulator.
2. The App is Lagging or Freezing
Solution: Check if your PC or Mac meets the minimum system requirements for running the emulator. Close other resource-heavy applications and try restarting the emulator.
3. Issues with Google Play Store Login
Solution: Double-check your Google account credentials. If necessary, sign out of your Google account in the emulator and sign back in.
Conclusion
Downloading and using the iCSee Pro app on your PC or Mac is a simple process that greatly enhances your security experience. By using an Android emulator like BlueStacks, you can enjoy the convenience of monitoring your cameras on a larger screen, whether you’re using Windows or macOS.
Whether you're setting up a new surveillance system or managing an existing one, iCSee Pro for PC or Mac allows you to stay connected and secure with ease. Follow the steps outlined in this guide, and you'll be up and running in no time.